Blog Post
25
Nov
Winter Sweaters and Applique Tutorial
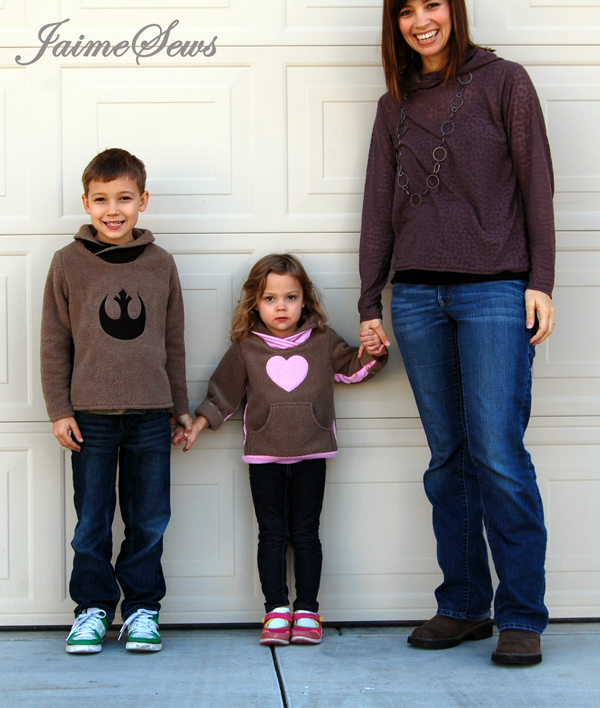
This week’s post is a day late because I’m participating in a Pattern Tour! If you’d like details about the pattern used for the sweaters I’m about to show you, be sure to head on over to the JaimeSews blog, but you’ll want to hang around here for some tips using fleece and a tutorial for applying simple applique to your project!
The kids and I are lucky enough to live close to F&M Fabrics’ brick & mortar, but thefabricmarket.com has some great Stretch Jersey selections that would be perfect for this project. As we walked down the aisle lined with the knits, the kids saw/felt/hugged/laid their heads down on this super fuzzy, exquisitely soft fleece.
If you’ve ever been shopping with your kids at the fabric store, you know it can be a challenge to focus. Well, we all fell in love with how unbelievably soft the fabric was that I completely disregarded that the pattern calls for knits.
Now Fleece is technically a knit, but 1) it’s bulky and 2) it’s not that stretchy. So here are some tips to using less stretchy or woven fabrics in a pattern that calls for knits. First, I cut the collar lining from a much thinner knit in order to reduce bulk. I also ended up cutting about 1/2″ off the neckline all the way around to widen it enough for their little heads to fit through.
After I got the collar attached, I realized there would also need to be some more room in the body and sleeve to compensate for the lack of stretch. I took the same knit I lined the collar with and made a gusset all the way down from the wrist to the shirt hem. I really loved how this added a pop of color to each top!
This particular problem could also be solved by choosing a size or two up. The Omni Tempore pattern has unlimited options, including different sleeve lengths, sleeve/waistline ribbing or regular hem, kangaroo pocket, collar or hood! I let the kids each pick out their own style features and since they chose the collar I thought it’d be fun to choose the hood for myself.
What I love about the hood is that it also looks like the cowl neckline the kids have, so especially in the fabric I chose, it still looks dressy. But…it DOES have a hood!
This knit I found at F&M Fabrics is a super soft, sheer knit, great for fall & part of winter here in CA.
So let’s get on to how to add the applique!
First you need to gather all your supplies:
- Scissors
- A pencil/pen
- Pellon 805 Wonder-Under
- Fabric to applique
- Your applique design. I just found the images I wanted to use on the interwebs and printed them out.
Trace the applique design onto the paper side of your Wonder-Under.
Rough cut around the applique design you just traced onto your Wonder-Under and place it on the wrong side of your applique fabric. Press a few seconds to tack in place.
Allow it all to cool completely. Cut out the traced design.
Peel off the backing of your applique, making sure the webbing is attached to your fabric.
Place on your shirt where you want it to be…
Then fuse in place using a damp pressing cloth (or fat quarter sized muslin/cotton scrap) until the press cloth is dry. (See also the directions that come with your Wonder-Under). Stitch in place with a zig zag stitch.
So there you have it – there are unlimited possibilities! Enjoy!


