Blog Post
Cowgirl Costume
Halloween is two months away so now is a great time to plan your costume sewing! For a little inspiration today, I’m sharing a Cowgirl costume I made earlier this year.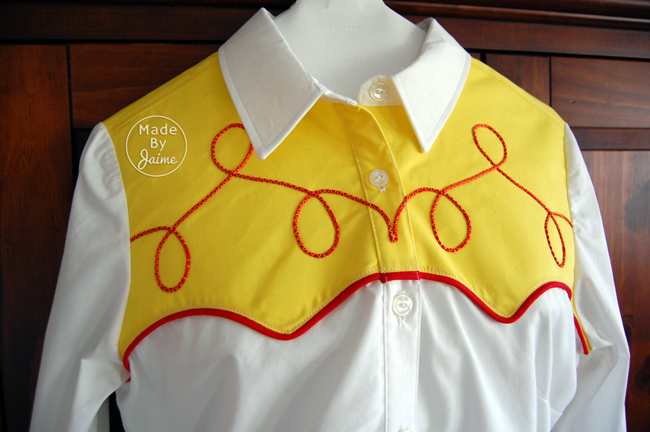
For the shirt, I used the Granville shirt pattern by Sewaholic. It comes in PDF format or in print. You could use any button-up shirt pattern or embellish an existing button-up shirt. I just cut the shirt without the front pockets and then placed tissue paper over the pattern to trace the upper front and back bodice. Instead of tracing the whole piece, I drew the lines across the bust line and the back the way I wanted the yoke section to look and used that pattern to cut the yoke from the yellow fabric. I added stabilizer and applied piping to the bottom edge. Then, after attaching to the white fabric pieces and constructing the shoulder seams, I drew the loopty-loop pattern across the yoke and stitched red rat-tail in place using a zig zag stitch the width of the rat-tail. 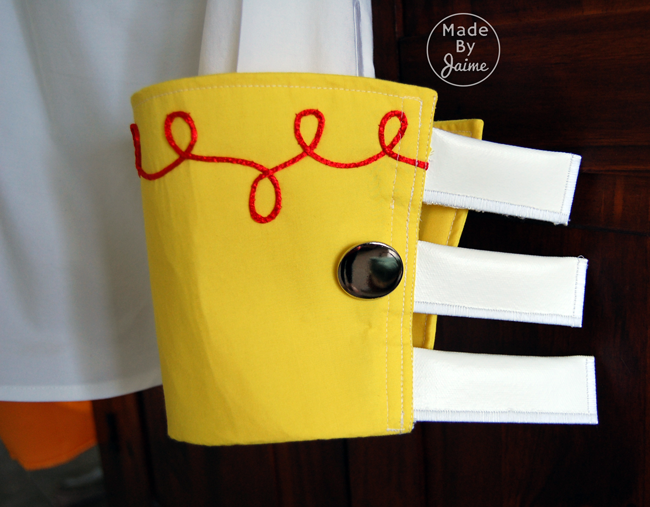
For the exaggerated cuff, I made the sleeve as instructed, but I drew, cut and added a large yellow cuff to be sewn in the bottom of the sleeve. I added the rat-tail decoration again…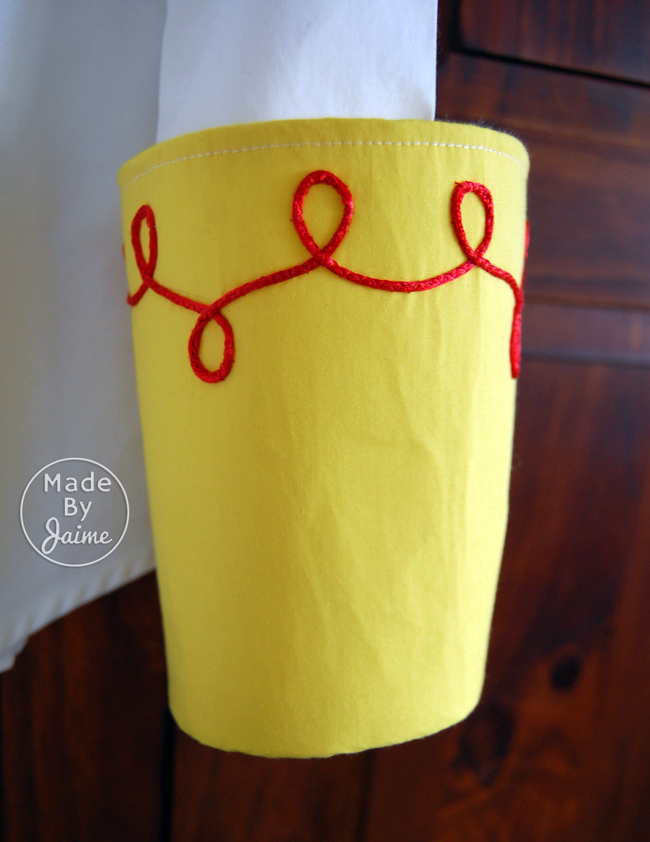
…and added white vinyl “tassles” on the outside edge (I’ll explain how I made those a little later). The sleeve placket has a button closure in it’s original form, which helps with getting the sleeve on and off. Consequently, I had to figure out a way to close up the extra cuff so I landed on adding some button elastic behind the middle tassel and installing a button on the inside of the opposite edge. Because the cuff was so large and the vinyl tassels so heavy (comparatively), I also added a strip of boning to the edge to help the cuff hold it’s shape.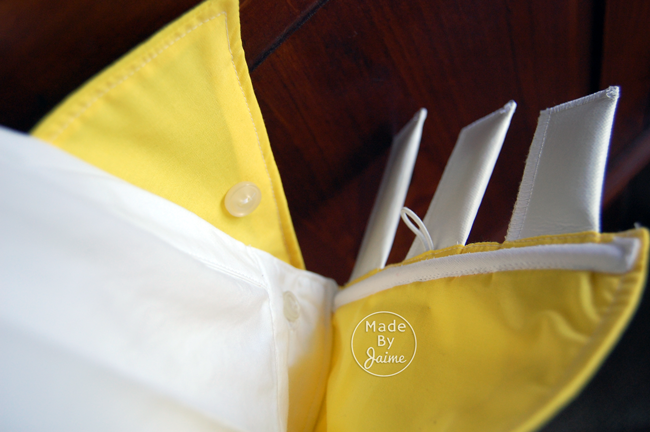
The pants for this costume were much less involved as we started with an existing pair of jeans. I just needed to create and sew on some chaps. I used tissue paper to trace the pant leg up to the zipper placket. Then I shaped the bottom out to a bell shape and cut 2 cow print and 2 white canvas pieces from this pattern. For each leg, I sewed black piping around the edge of the cow print piece and then made the white vinyl tassels.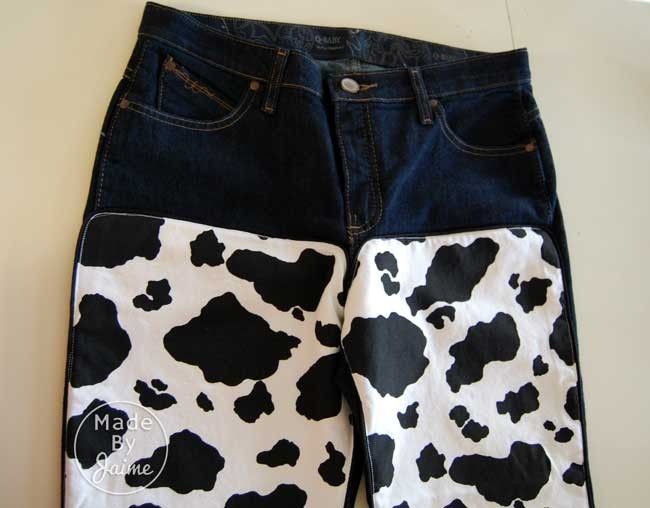
The tassels were very simple to make. I cut pieces 3″ x 6″ and folded them in half lengthwise and wrong sides together. I used my home machine to stitch a satin stitch around the raw edges as a way to finish them and hold it all together. After placing them along the edge I trimmed to a length that seemed proportionate and sewed them in the seam.
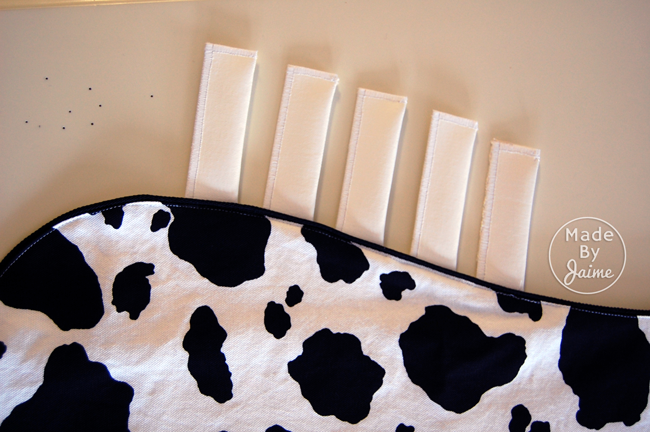
I then put the canvas lining and cow print right sides together and sewed all the way around, leaving an opening to turn. After turning & pressing, I top stitched close to the piping and then placed the chaps on the jeans. I stitched them down along the top-stitching as far as the shape allowed, which meant from the inside knee, along the top and down to the outside knee. Then, just so they wouldn’t fly all over the place (since they would be worn during a dance routine), I stitched them down at the front hem. 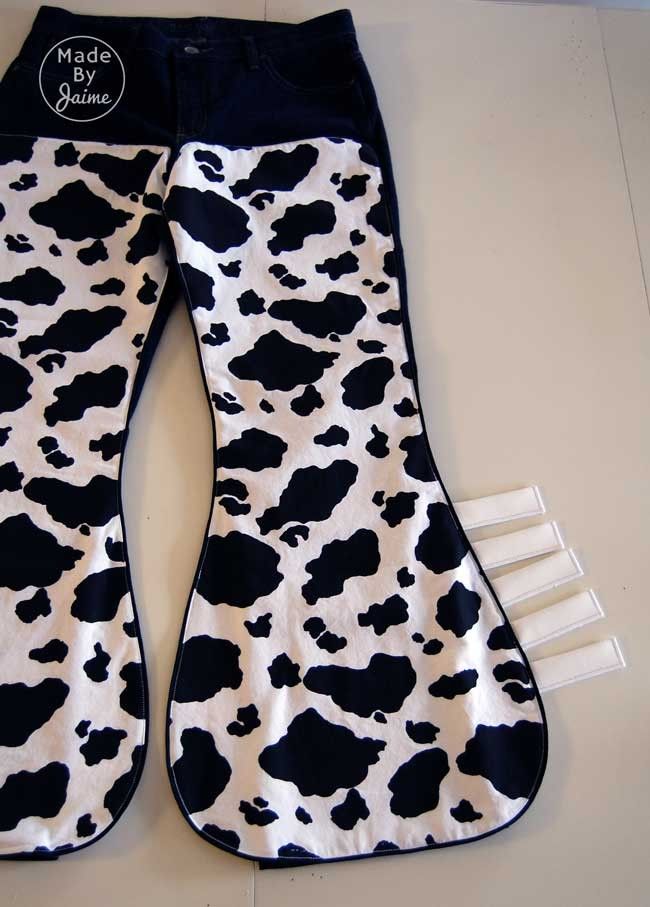
I thoroughly enjoyed the creativity involved in making this costume – the chance to veer off the pattern path and freehand all the details and features. I hope it ignites some inspiration and ideas for your costumes this year. If you make something from the fabrics you get at TheFabricMarket.com, be sure to share in the comments or on our Facebook page!


You’re AWESOME!!!! This is EVERYTHING I ever wanted as a child!! Well………………guess I just spilled my BIG aspirations as a kid, huh?!! Great Job Jaime!
Thank you Chelle! It was a fun project to figure out. This project was actually for an adult so I guess our childhood aspirations never die! 🙂
How can I get the Potton
Hi Phyllis! The pattern I used as my starting point is linked up in the first paragraph – it was the Granville Shirt pattern by Sewaholic. You can get the pdf version here: https://www.sewaholicpatterns.com/granville-shirt-pdf-sewing-pattern/ or a paper version here. https://www.sewaholicpatterns.com/granville-shirt/ The pants I just copied the front of her jeans and free handed the bell shape at the bottom. Hope that helps! Thanks for stopping by!